
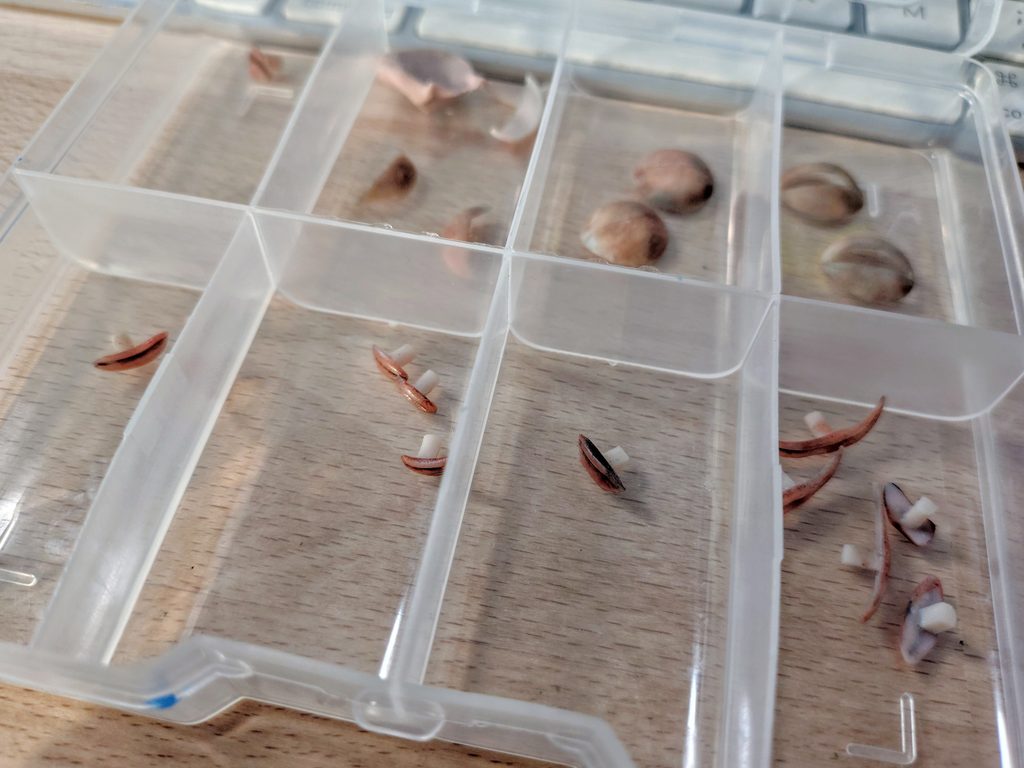
Most of the time in stop-motion animation, eyelids are separate little cups or nail-clipping-looking objects, made out of various materials (plasticine, resin, paper…) which are placed on and off the eyeball of the character as required. They can look like this (here at the back, with mouths at the front – I admit it’s not the best photo to illustrate eyelids since it wasn’t the focus of the photo!):
They’re most often ridiculously small and fiddly to handle. It is well-known in the stop-motion world that the floor is attracting eyelids like a vacuum. Since they’re so fiddly, you regularly drop them and since the character is usually not very far from the edge of the set, they bounce and fall directly onto the floor. And usually the floor is a right ol’ mess, with cables, stands, hot glue and gaffer tape remains, general dust from set-dressing or animation or just life, and which no one sweeps because knocking anything would be a catastrophe.
So you’ve lost your eyelid on the floor. You take 5 minutes to look for it, but soon enough, looking for eyelids is just too costly for production. “Fine”, you will tell me, “just grab another one!”. It’s true that model-makers make many replacements for that very reason, however it happens really often that replacements are not actually exactly the same and if your character is seen from up close, changing one eyelid for another creates a “plop” on the eye, when you watch the animation, and the eyes are the one place that the audience is looking at near-enough all time. How frustrating!
This is how I started to install “eyelid hammocks”, to catch the eyelid before it falls all the way down to the floor. Particularly in cases where the character is hovering above the void without any set floor under it. Such was the set-up in this shot, from “Včasih sem Papirnati Zmaj” by Leon Vidmar. The character was going through a hole and my eyelids were doomed to fall through the hole and onto the messy floor, with sure chances to be lost forever.
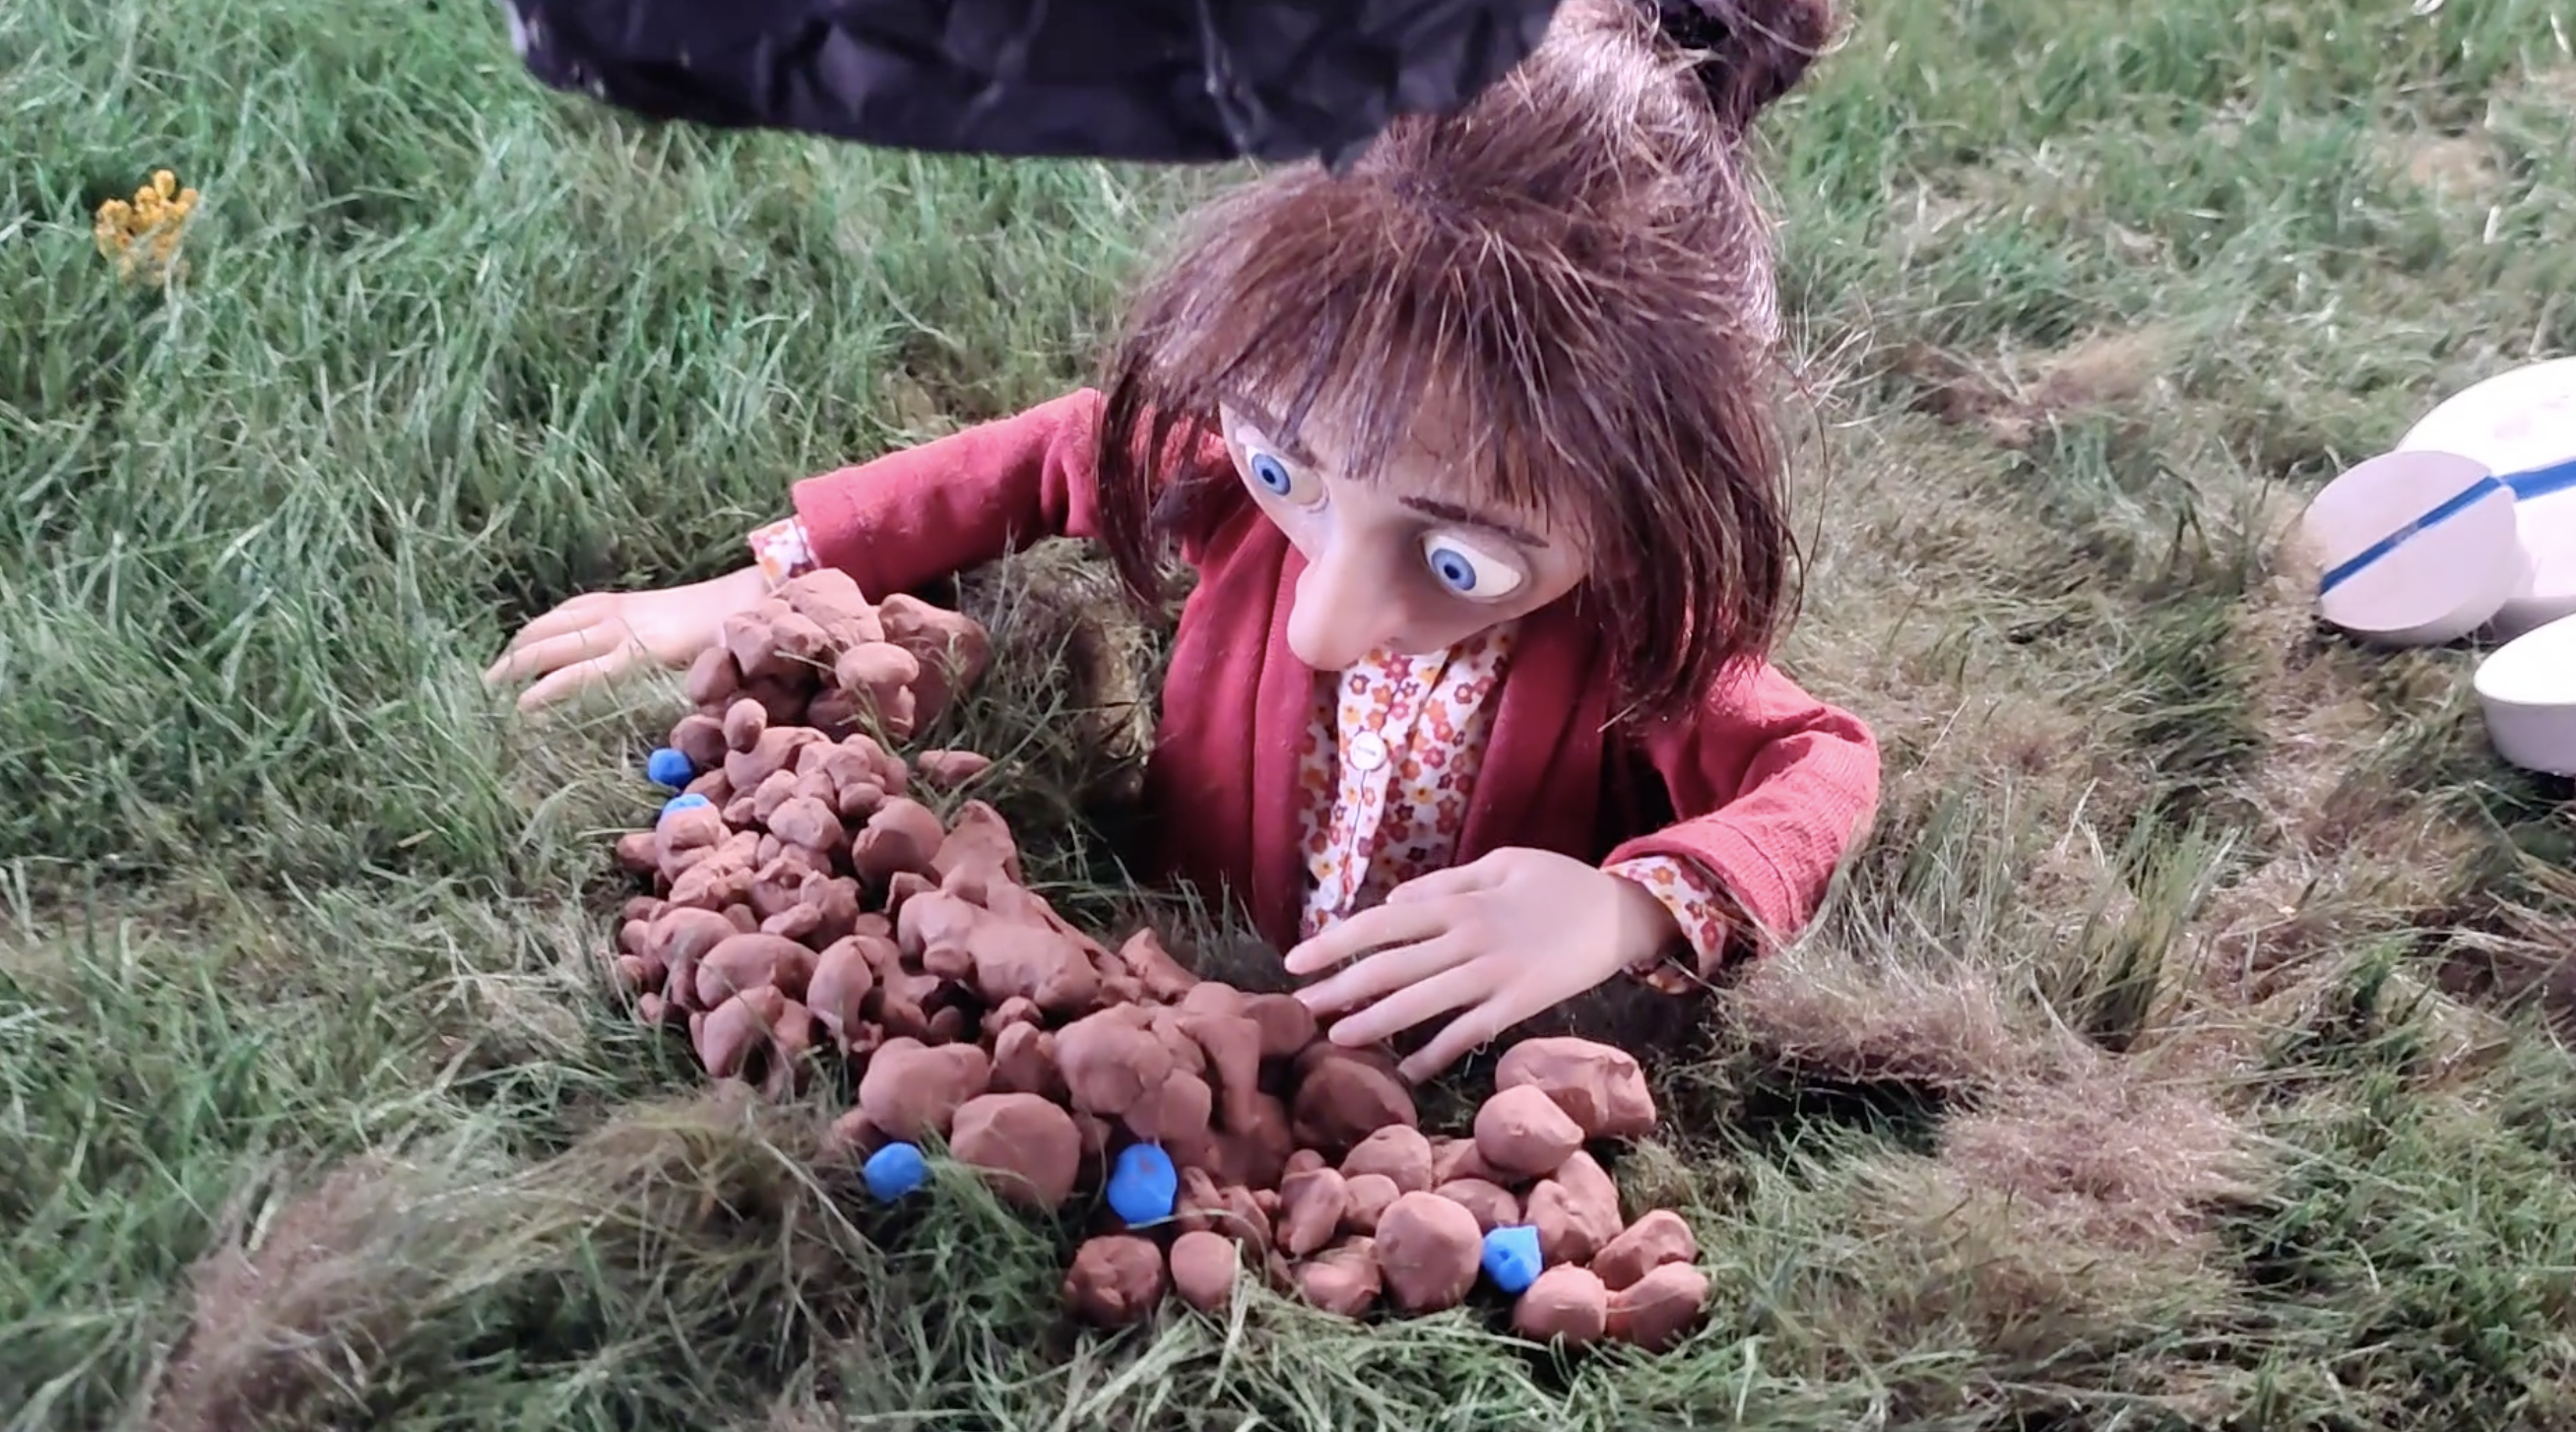
A prime occasion to build a hammock! The hammock can be made out of fabric, paper, cling film… whatever is handy. The only critical thing to keep in mind is that your hammock shouldn’t change the lighting in the scene. For example, if it is light in colour or if the cling film is creating reflections and your hammock is placed in a way that it’ll bounce lights onto the set or the character, you will have to re-think your set-up. In this case, there was no danger at all, as the hammock was entirely under the set:
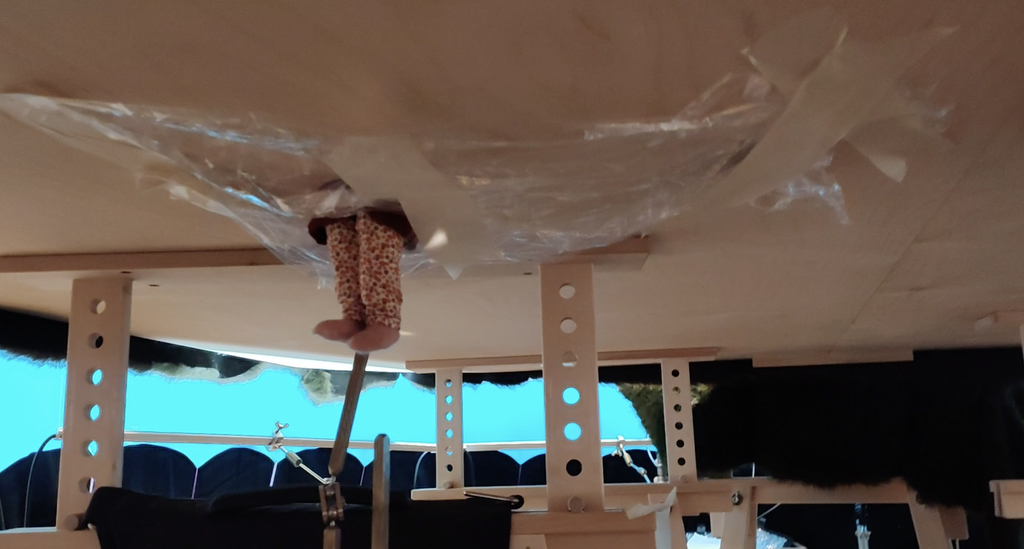
Another thing to keep in mind is that your hammock must be concave enough, otherwise your eyelid might bounce off your hammock itself if it’s too flat. Give it a nice, deep curve so that the eyelid stays at the bottom of your hammock, ready to be scooped out.
Of course, here, the character had to pass through, but the hammock was close enough that it caught all my falling eyelids and saved me quite a lot of time and energy.
A simple little nifty thing for today! Hopefully it’ll serve you well in your animations!