As I’ve started again on the animation of the video game Out of Words by the studio Wiredfly up in Denmark, I’ll be sharing a few more little tricks from the short film “Včasih sem Papirnati Zmaj” by Leon Vidmar.
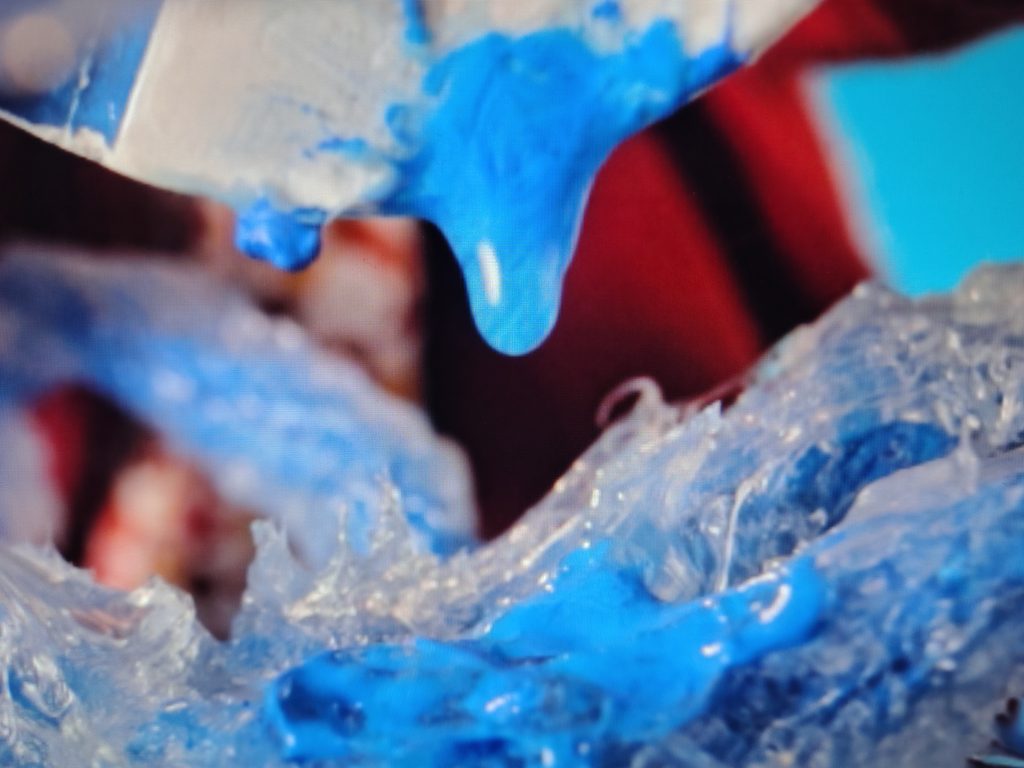
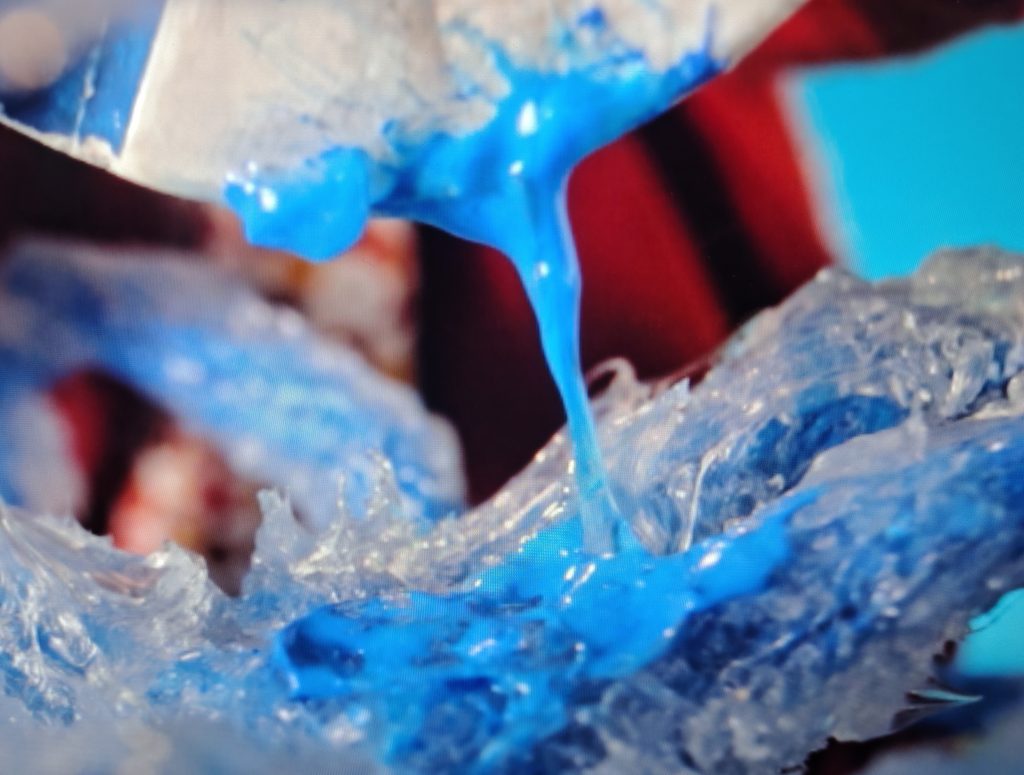
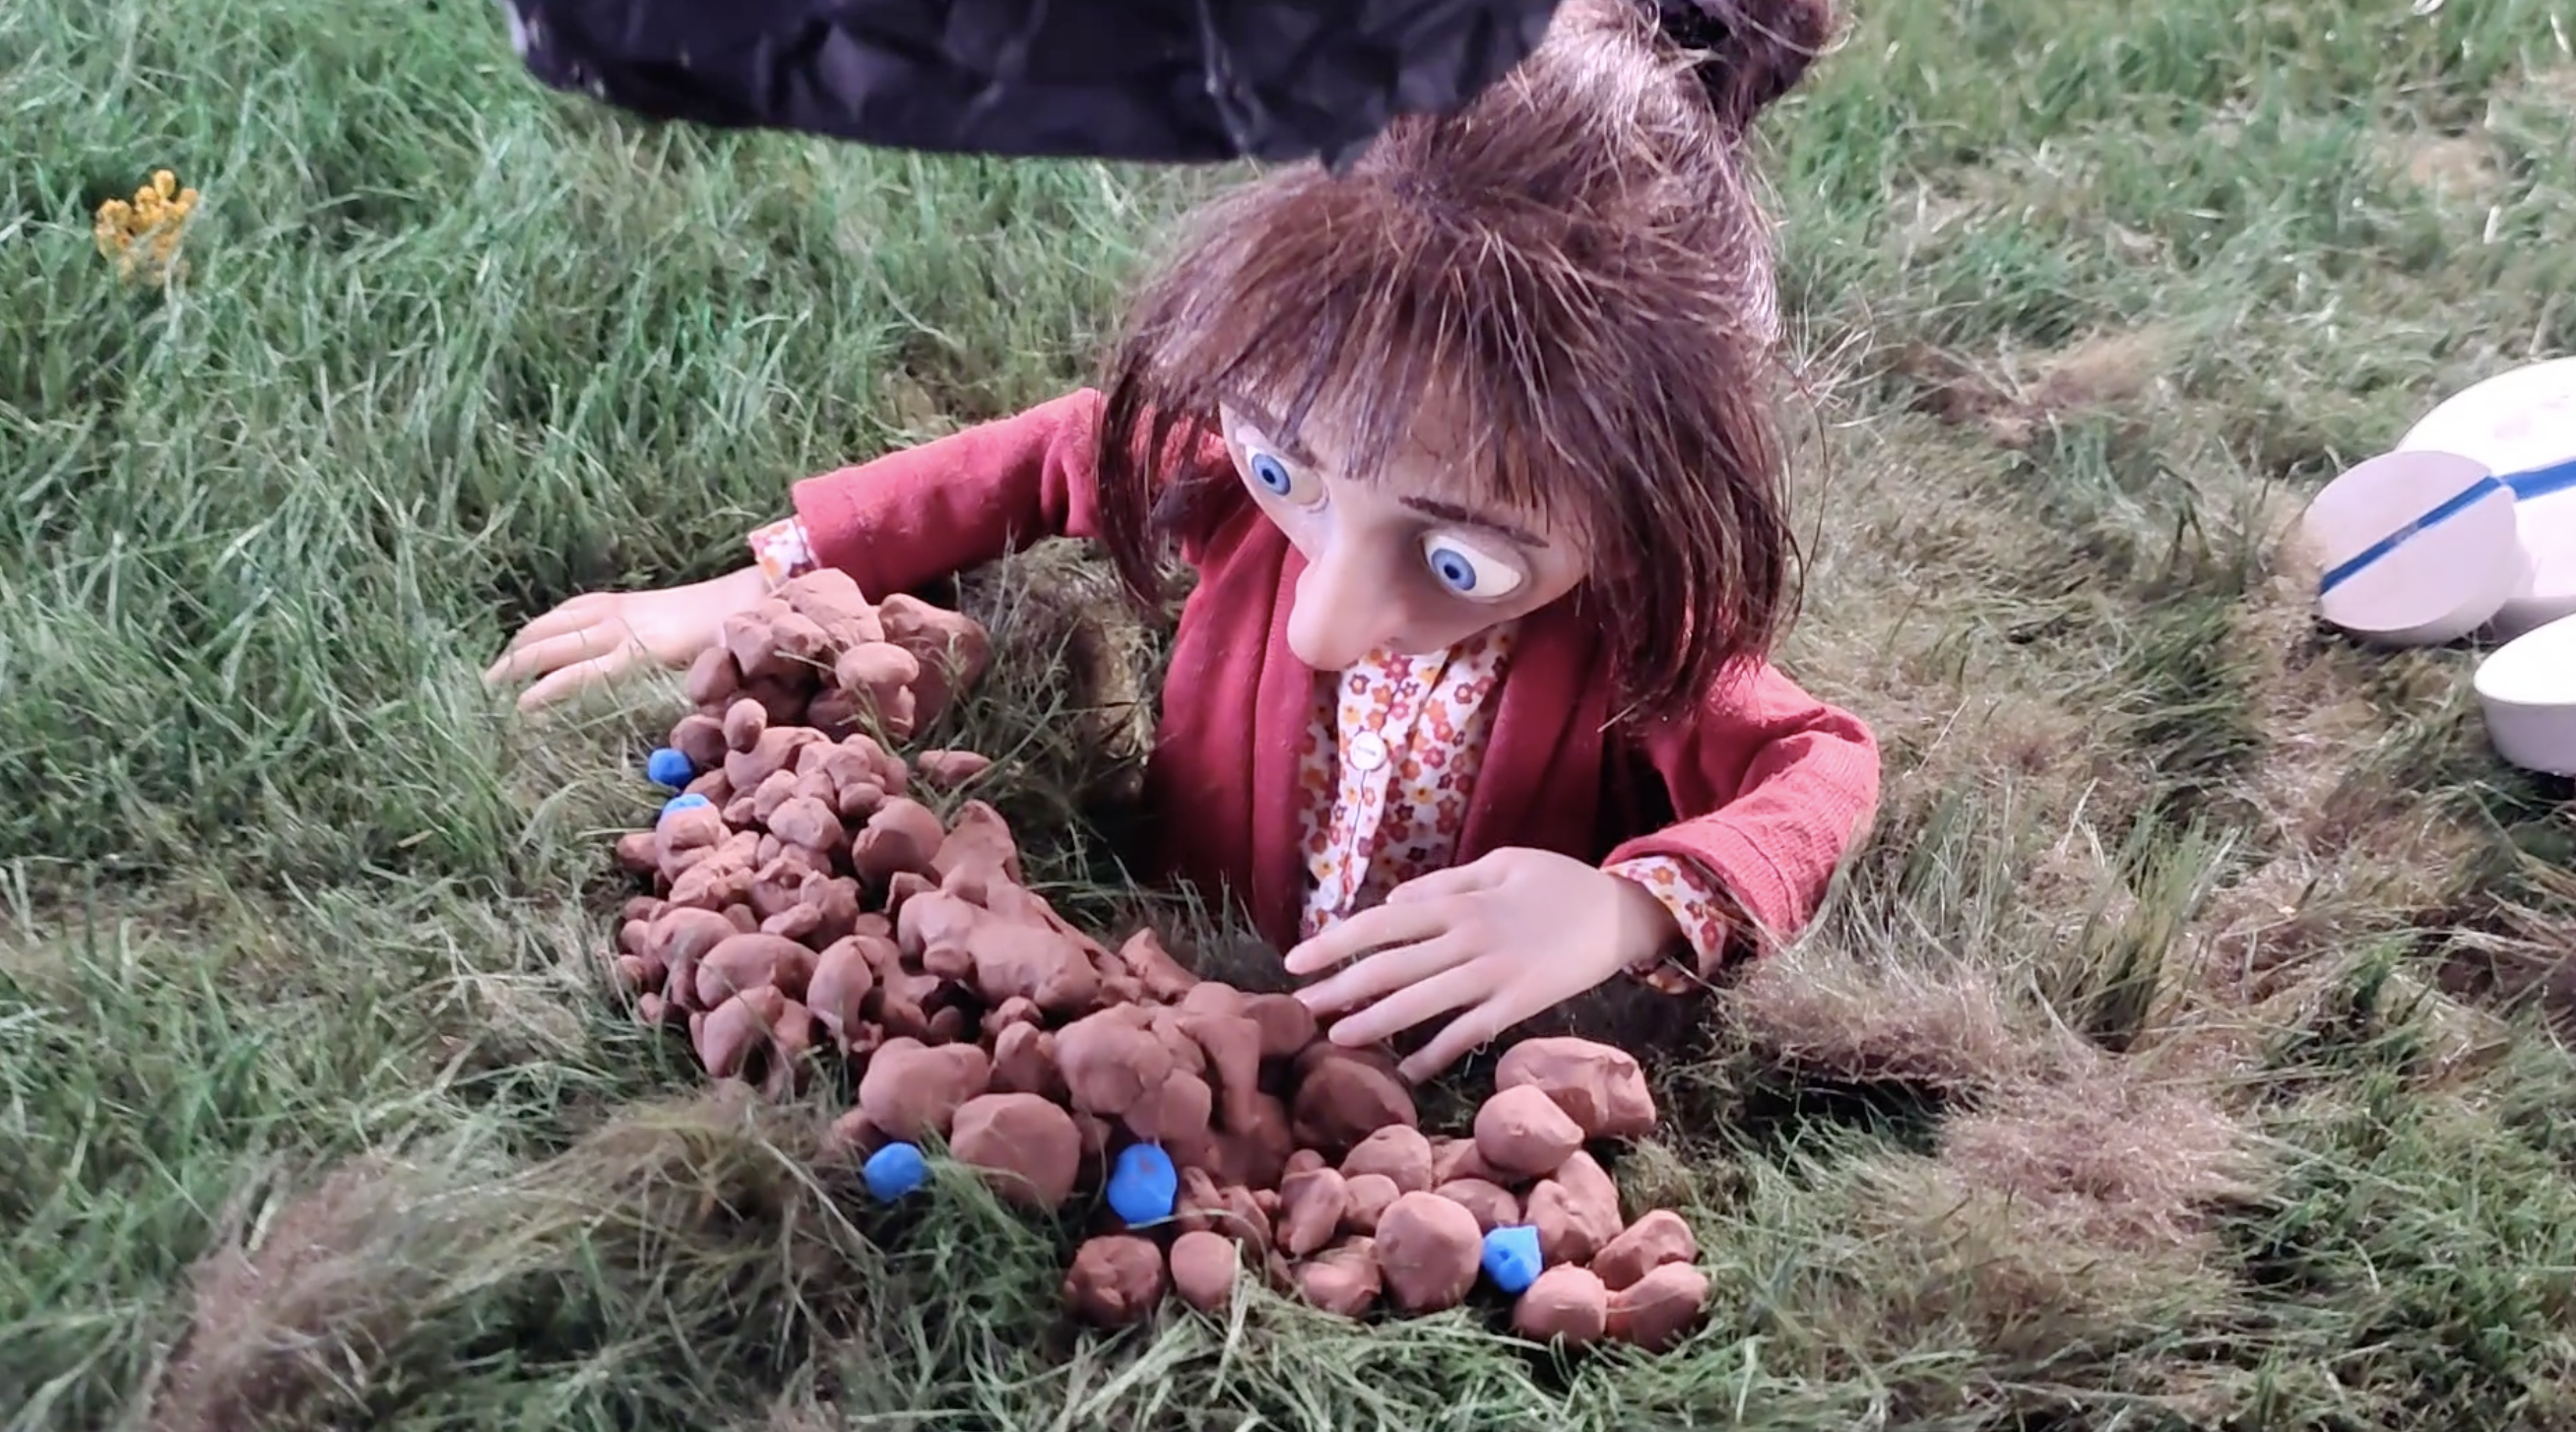
This time, it’s something that doesn’t look like it should work, but totally does! I had some viscous liquid to animate for a gorey shot where the main character hits a creature repeatedly, opening wounds of blue goop. The slimy substance was connected to the weapon (a medication tablet) for a while before breaking into drops and smudges in the frames afterwards. If the design of the film requires that you use a fairly realistic substance (in this case lubricant gel) to show that liquid, it can be quite tricky to attempt controlling its shape frame by frame.
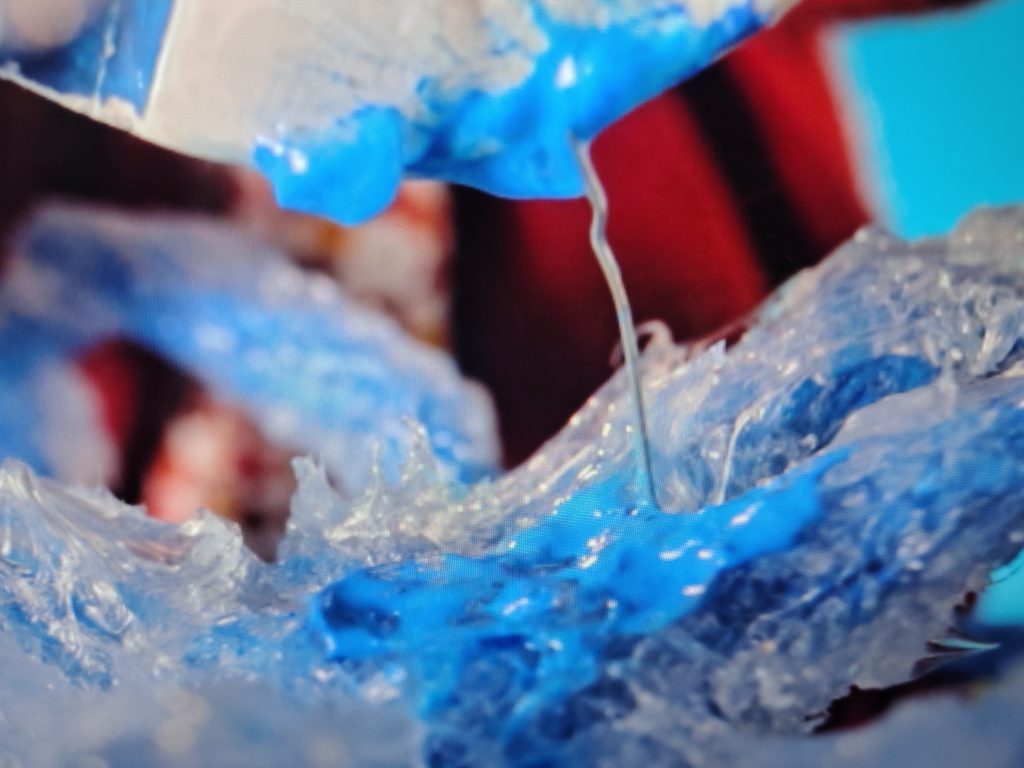
It can be done with patience and trial and error. Here however, I tried out a little system that I thought of a few years ago: I propped a little bit of wire in the size and direction that the string should take:
It very much looks like the wire should show in the transparency, however the light reflections typical of liquid shapes completely hide that visible line among the natural reflection lines. Of course in this case, the liquid has semi-transparent blue swirls in it, but it’s totally the same with clear liquid. Once the wire is propped, we just need to coat it with lubricant (or any other substance that you’re using in lieu of water) to have the desired string of liquid or dripping liquid, fully controlled and ready for a frame:
If you know it’s there, you can see the wire. But if you’re not looking for it, it looks like natural reflections and internal shadows from that dripping liquid.
I hope it’ll help you with the special-effect shots you might have in the future and which are so fun to experiment with!
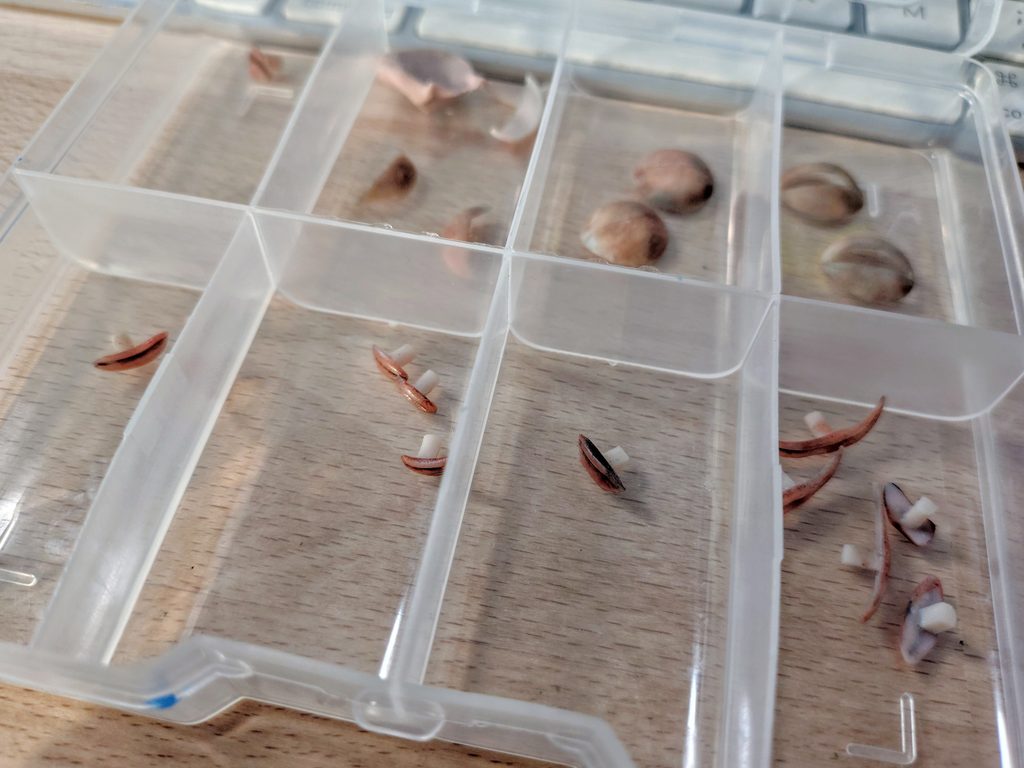
Most of the time in stop-motion animation, eyelids are separate little cups or nail-clipping-looking objects, made out of various materials (plasticine, resin, paper…) which are placed on and off the eyeball of the character as required. They can look like this (here at the back, with mouths at the front – I admit it’s not the best photo to illustrate eyelids since it wasn’t the focus of the photo!):
They’re most often ridiculously small and fiddly to handle. It is well-known in the stop-motion world that the floor is attracting eyelids like a vacuum. Since they’re so fiddly, you regularly drop them and since the character is usually not very far from the edge of the set, they bounce and fall directly onto the floor. And usually the floor is a right ol’ mess, with cables, stands, hot glue and gaffer tape remains, general dust from set-dressing or animation or just life, and which no one sweeps because knocking anything would be a catastrophe.
So you’ve lost your eyelid on the floor. You take 5 minutes to look for it, but soon enough, looking for eyelids is just too costly for production. “Fine”, you will tell me, “just grab another one!”. It’s true that model-makers make many replacements for that very reason, however it happens really often that replacements are not actually exactly the same and if your character is seen from up close, changing one eyelid for another creates a “plop” on the eye, when you watch the animation, and the eyes are the one place that the audience is looking at near-enough all time. How frustrating!
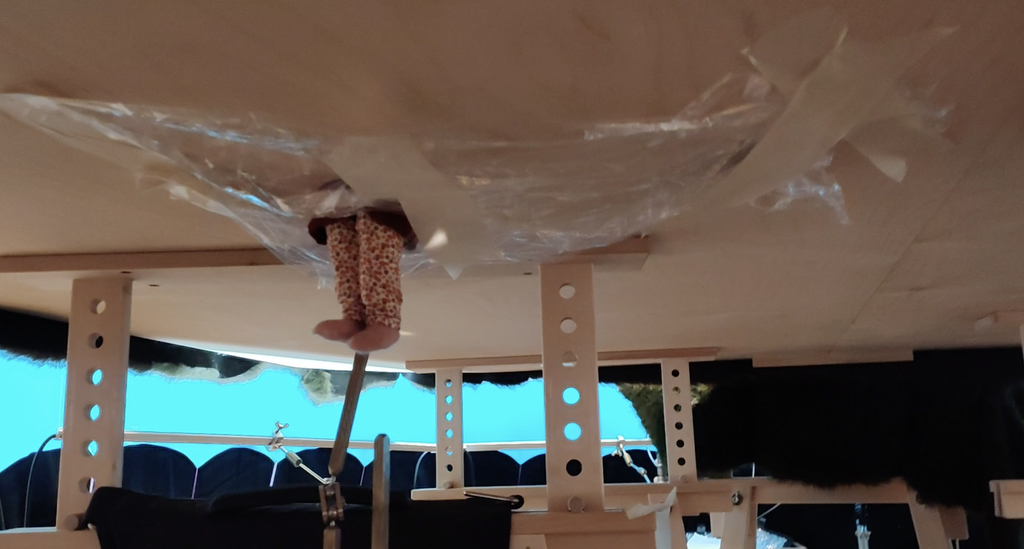
This is how I started to install “eyelid hammocks”, to catch the eyelid before it falls all the way down to the floor. Particularly in cases where the character is hovering above the void without any set floor under it. Such was the set-up in this shot, from “Včasih sem Papirnati Zmaj” by Leon Vidmar. The character was going through a hole and my eyelids were doomed to fall through the hole and onto the messy floor, with sure chances to be lost forever.
A prime occasion to build a hammock! The hammock can be made out of fabric, paper, cling film… whatever is handy. The only critical thing to keep in mind is that your hammock shouldn’t change the lighting in the scene. For example, if it is light in colour or if the cling film is creating reflections and your hammock is placed in a way that it’ll bounce lights onto the set or the character, you will have to re-think your set-up. In this case, there was no danger at all, as the hammock was entirely under the set:
Another thing to keep in mind is that your hammock must be concave enough, otherwise your eyelid might bounce off your hammock itself if it’s too flat. Give it a nice, deep curve so that the eyelid stays at the bottom of your hammock, ready to be scooped out.
Of course, here, the character had to pass through, but the hammock was close enough that it caught all my falling eyelids and saved me quite a lot of time and energy.
A simple little nifty thing for today! Hopefully it’ll serve you well in your animations!
When you animate a shot with as many moving parts as this shot from “Beyond the Face” (by Anja Resman, from 2024):
Or this one from “Včasih sem Papirnati Zmaj” (by Leon Vidmar, still in production):
…you have 2 choices: you can sweat a lot, checking your video assist on Dragonframe back and forth for every single animated part, with the risk that you wouldn’t see and forget to move one or more of these parts, or you can build yourselves a system to save time and ensure that everything is animated at every frame. I’ll share with you what my systems were for these 2 shots and I hope it’ll help you find your own bespoke tool for the unique shots you will have to do yourself.
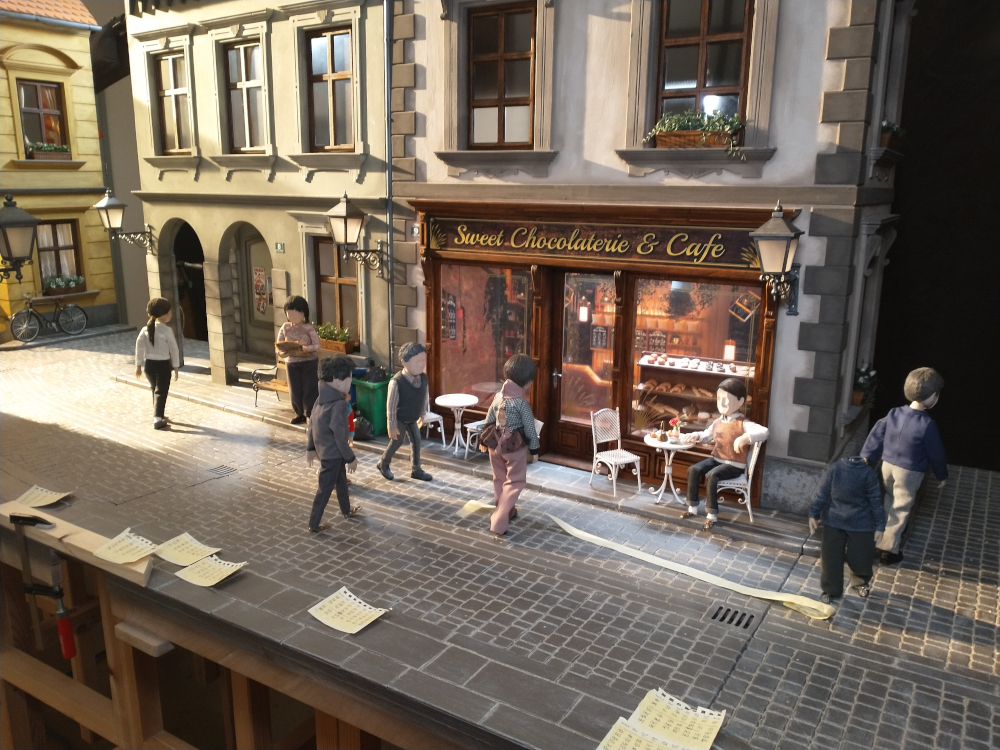
For the shot on “Beyond the Face”, those multiple walk cycles in all directions and all stages of the walk cycle, I created one little note-paper for each character, then on the paper for character #1, I gave a name to each of my walk-cycle poses and I assigned the logical frame number on which each of these poses will fall (those of you who have participated to my animation courses recognise this trick – which is a trick I’ll detail another day here on this blog), then I placed that note in line to where that character #1 is in space, just off-camera, on the edge of the physical set, as so:
You can see that the edge of my set holds the notes and they are placed off to the side but somewhat accurately if you take a bird’s eye view of the scene. Of course I made the notes progress along the set as the characters themselves progressed in space. You can also see a piece of paper strip that was taped at one end and not at the other. This strip had markings on and they helped me keep track of where the 2 central characters, going towards camera, should be in space at this or that frame. I rolled the strip out of camera view when I grabbed the frame and I rolled it back on the ground when working on the characters. The taped end of the strip was stuck to a place on the set which was never going to be in shot, that’s why the strip was so long and needed to be rolled in and out.
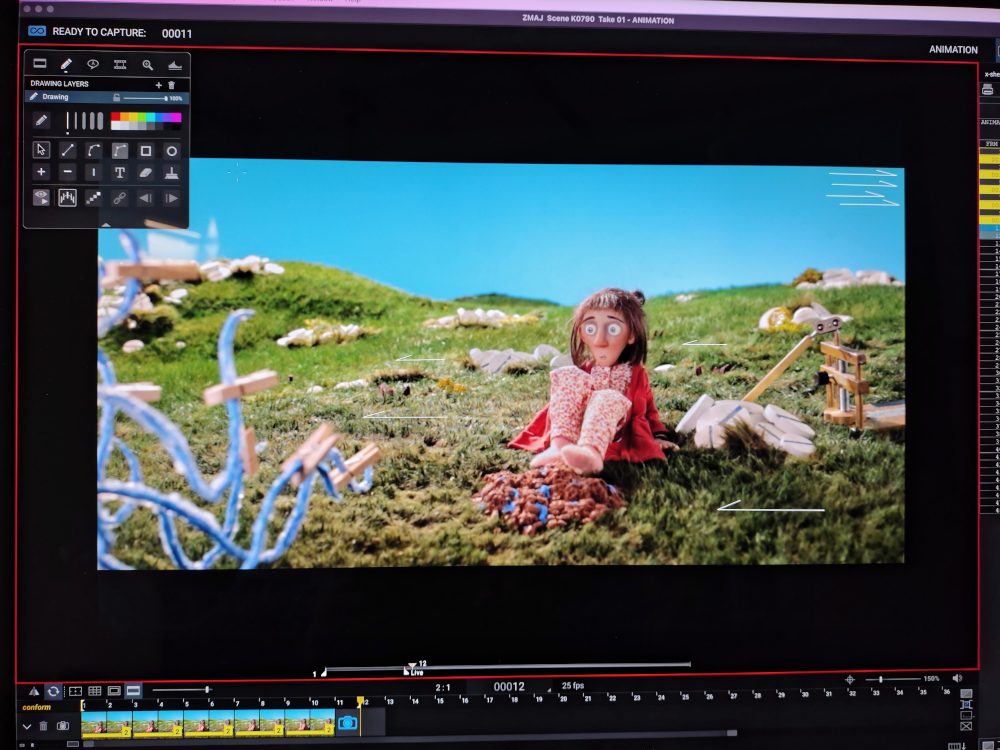
On the other shot with the blue creature from “Včasih sem Papirnati Zmaj”, I had 2 main things that were out of the ordinary and that I needed to keep track of: the grass that the wind swept (and in real life, I used a paintbrush to caress the grass) and the tentacles of the creature. For the grass, I used the marker tool in Dragonframe to draw arrows on the screen and I placed either an arrow pointing left or one pointing right, depending on the direction the wind was blowing on that spot of the grass. I drew a few arrows and I just “stored” the unused ones (here in the top-right corner on my screen) ready to be used when the direction changes or another spot of grass is being swept:
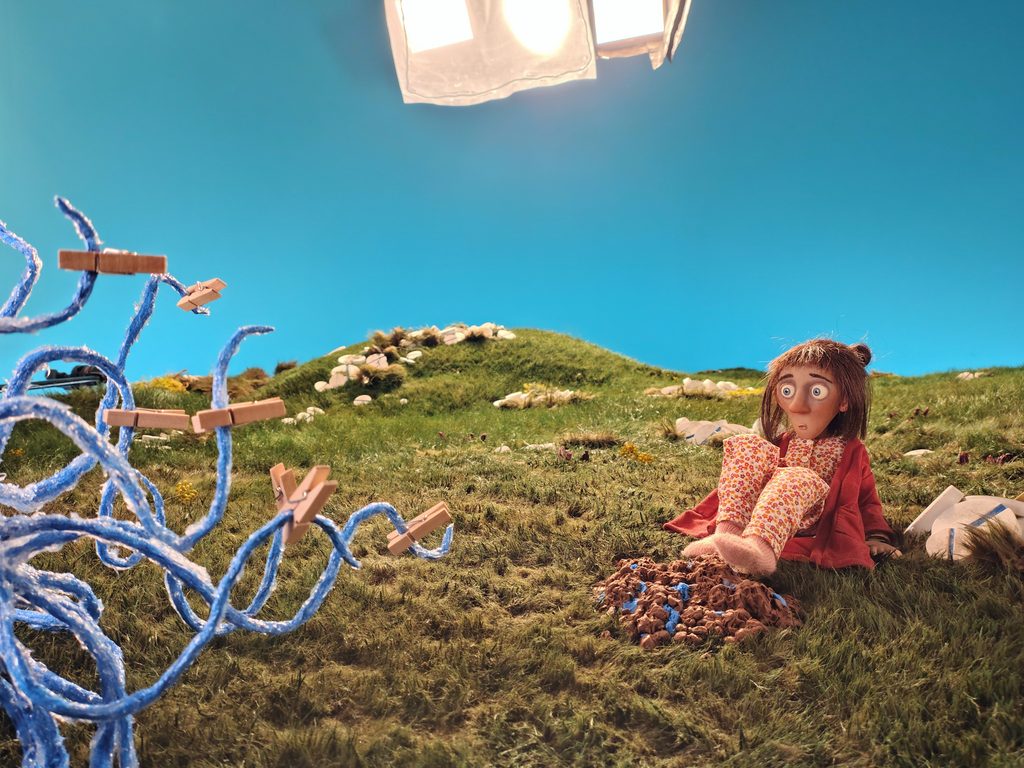
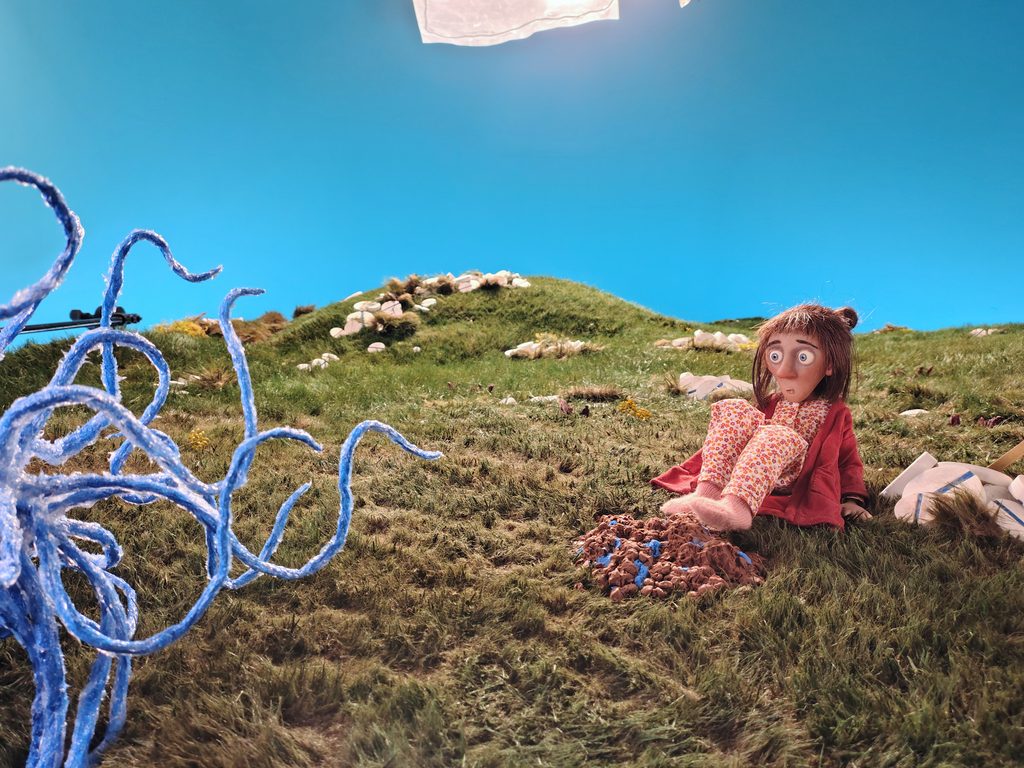
For the tentacles of the creature, I didn’t know what to use and I thought I’d make some kind of markings on the screen. I wasn’t too crazy about this solution as it seemed to me that it’d be cumbersome and still very open to missing some tentacle or other. I kept thinking as I was preparing the other stuff in the scene, then I noticed in the studio these mini, almost toy pegs. I instantly knew I found my system. The pegs went out one by one, as I progressed along the animation of each tentacle and when I didn’t have any on the creature any more, I gave one last check at the video assist, back and forth, and I took the frame. Then I put all the pegs back on and I started animating the character, then the grass, then the creature, peg after peg, tentacle after tentacle.
I really hope this is opening up a lot of ideas to make your life easier on set and avoid mistakes when you have tricky actions like these to keep track of.
Until next time for more tricks from my time on the film “Včasih sem Papirnati Zmaj”!
I get asked about breathing quite a lot when I give my training courses and especially when we get to the topic of animating life when the character does nothing at all, doesn’t move (what I’ve been calling animating “nothingness”, which is important to keep as exactly that: nothing – no movement, but still some life). It’s extremely difficult. But making the character breathe just because they’re not moving is not the answer. Partly because we don’t see people breathe in normal life and partly because well… you haven’t made your character breathe before that point, did you?
However, of course we animate the character breathe in very particular circonstances. Like, obviously, if we hear in the sound their heavier-than-normal breathing. Or when it goes along a physical effort (even if you don’t hear it in the sound). Also when the character sleeps because it’s absolutely expected by the viewer in this total stillness (the viewer will feel like suffocating if you don’t make your character breathe on screen while sleeping – empathy is a magical thing!). Not forgetting too: when the character sings. Don’t forget to place some breathing intakes, even though music will drown that type of sound and you will therefore not have any clues when to place those! You will have to figure out when and animate them.
So, this is all well and good, but how to animate a stop-motion character breathe? It can be extremely tricky. First, let’s talk about body parts going where and how: with the lungs filling up with air, the chest puffs out and with the exhale of air, the chest empties out, meaning it goes inwards. Which is not something we can easily do, unless we have a rockstar puppet from the model-making department (basically most of us will not encounter a puppet like this, ever – I only did on the short film “Un Coeur d’Or” by Simon Filliot). So we have to cheat to give the impression. With the chest filling in with air, we can raise the shoulders a teeny bit and lower the chin a teeny bit, to give the illusion. And the reverse motions of shoulders and chin for the chest emptying/exhaling. This is one cheat. Sometimes I don’t have great access to shoulders, but I do have separate clothes. In this case, I can act on these, pulling on the clothes outwards and raising the chin for the chest filling in and pushing the clothes and the chin in a bit for the chest exhaling. The manipulation can be a bit tricky in order to get under the top that the puppet is wearing and it might require to make yourself a custom tool.
Case in point, these last months, I’ve been animating on “Včasih sem Papirnati Zmaj”) (Sometimes I am a kite), a short film by director-animator Leon Vidmar. I’ve had you guys in mind that whole time and I made photos and videos to share with you. For example, I made a video of the breathing I did, with what tool, what increments and for what results. Here’s the tool. Nothing flashy as you can see, just a twisted and shaped bit of aluminium wire:
And now, here is the resulting breathing motion, first the movement frame-by-frame, then full-speed:
If your stop-motion puppet doesn’t have clothes and you want to act on more things than just chin and shoulders, you can act on the texture (plasticine, silicone, resin, paper, wool, you name it…) by brushing the surface always one way; then always the other way (albeit minimally!) to affect the texture itself or the way the light reflects on it and therefore mimick an exhale and an inhale.
You might have noticed in the examples I gave earlier that, in one example, I animate the chin in the direction of the chest filling up, and in the other example, I animate the chin in the counter-balancing direction to the chest filling up. It doesn’t depend on what other elements you animate with it, it depends on how strongly you consider your character is breathing in and out and/or on how mobile and independent the neck is for your character in the context of the scene. As most often is the case with animation, try out both options on your own body or on a colleague’s and what you should do between these 2 options will become apparent.
I hope it helps you guys negotiate the rather rare times we have to animate breathing.
As always, if you find this advice useful, don’t hesitate to tell your animation friends about this blog. I will write up and upload more tips from that Leon Vidmar’s short film very soon!
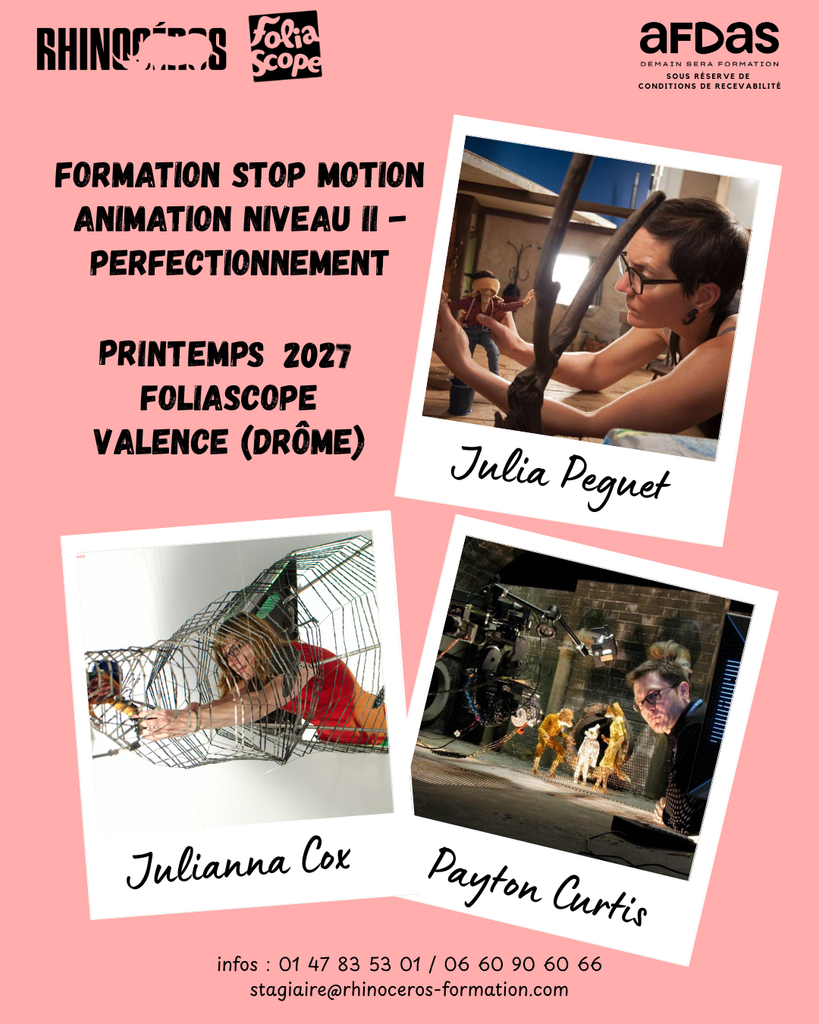
Hi all! I have extremely exciting news about an upcoming training course! I have teamed up with 2 of the best animators (with Laika and Aardman credentials) to offer a Level-2 animation training course with our good friends from Rhinoceros Formations.
The amazing thing is that it is open internationally! Meaning anyone can apply, it will be held in the Foliascope Studio in France and it will be held in ENGLISH!
For French participants who have rights within the AFDAS system, the course is fully funded. For international participants, the course will cost 5600€ before tax or 6720€ tax incl. (maybe some of you can find an agreement with a studio you work with or can ask for fundings or aids in your own country)
The course is Level-2 Animation meaning it’s of course more advanced than the courses I usually offer. This is a FIRST and it’s very exciting indeed!
Yes, there will be a selection so that we are sure to give appropriate training to people who are ready to receive this training, but (and I cannot emphasise this enough) you may not be the best person to judge yourself – precisely because you are not a very experienced animator, you might actually be missing (as of yet) the skills to notice the good stuff, the promising parts, the bits with potential. I’ll tell you a story (which some of you know) to illustrate my point: In 2003, I had animated a handful of seconds in stop-motion animation, with broken puppets, on a table in my flat. I was sending this very meagre demoreel around and was being rejected. Until someone told me Aardman was looking for animators. Not knowing if I should laugh or cry, convinced that I had no chance, but knowing that hell! I had nothing to lose anyway, I sent it and promptly forgot about it. Would you know, I got called in for a test and off of that test, they offered me a spot as an animator! And I worked there back-to-back for almost 10 years! Julianna and Payton both absolutely have similar stories. Both their animation careers started off just as humbly and they both became Laika animators!
Lately, I’ve been enjoying a period of well-deserved leisure after a long succession of many jobs. But of course, because this is me we’re talking about, I also glanced at my “not-urgent to-do list”.
Almost a year ago now, before I went to work on Out of Words at Wiredfly, a friend who is debuting as a director, Sašo Dudić, asked me to animate his production-company logo to put in front of his short films. The idea was extremely appealing and the timing was initially good in my head: I could animate a quick little thing on one of the units at Wiredfly on a weekend or at the end of a working day. Ha ha ha! How delusional of me! Of course, I had no time at all either side of a working day at Wiredfly, what with having a dog who also requires 2-hour walks every day and weekends were not any better, having far less overall “work” capacity after 25 years in the industry.
So here we are, a year later, fully rested and enjoying a leisurely period, and deciding almost on a whim to switch the lights on and sculpt my way through the animation of Broken Arm.
I walked into the downshooter unit of the very kind-hearted association/production company Dagiba, in Ljubljana (fronted by the extremely talented animator-director Timon Leder who let me shoot for free), with only a bit of plasticine, 2 bones that I salvaged out of a Halloween toy (good timing!) and pretty much no idea what I was actually going to do with this Broken Arm concept.
The participants of my animation training course have heard me hammer time and again how important it is to prepare one’s shot. Well, I did exactly …the opposite. I had a very faint idea of what I’d like (the dynamic tearing of the skin leaving two bits of bones exposed and falling like broken clock hands at the very end, but no idea how to do the tearing, what the timing should be, or the actual squash & stretch motion, not even whether I’d have shirt sleeves or not. I improvised each frame all the way until about mid-shot where I had a clearer vision til the end. Sometimes you just gotta have fun
And I hadn’t even told Sašo that I was shooting his logo that day, because I wanted no pressure at all to even complete it there and then. I wanted just fun!
Well, this little productive tantrum for sure made someone happy. Some-2 actually, because I had had an absolute blast sculpting through that plasticine animation all day, of course! But he also was over the moon, extremely touched that I did it at all and he loved it! I hope you do too.
There’s nothing like the pure joy of animation when you don’t have deadlines or even a brief 😅🤣
Hi everyone! Today, I want to talk about dynamic movements, using 2 examples that I animated. The first one from “The Pirates! In an Adventure with Scientists“, shot at the studios Aardman Animations. This scene comes right after the previous clip on this blog thread. Pirate Captain is struggling for a beat to get the sword to cut the sausages then it comes through at once.
When you’re a junior animator, it can be very daunting to create increments between the images that are extremely far apart in space. We’re so used to having frames that look almost identical to the previous one that it becomes a bit of a mechanical habit in our animations. Dynamic movements demand that you go bold and that increments, at the heart of the action, are very different – that the movement has progressed almost entirely from one frame to the next. You rarely, if ever, need to show the middle poses. It would kill your effect, which is to go big and go fast. Here’s the clip:
The secret of dynamic movements is what I call “pre-analysis” and “post-analysis” for the brain. It’s there to give your brain information before and after the move. We’ll see about after the move further below, but for now, the pre-analysis before the move will allow the brain to anticipate (yes, it’s often the anticipation that you’ve learnt about in animation class) an action that your brain will not have time to actually see, because it will be too fast. So here, the struggle is maintained in time to create pre-analysis – the brain is already now understanding what’s coming. Then when the brain doesn’t see the action so clearly, it actually sort of has, because it “saw” it before it even happened.
Here it is frame by frame:
You can see that the increments at the heart of the action have gone real far very suddenly. You can have a sense of when I go into 1’s (this means shooting every single one of the poses in my 24 fr/sec rate), because “far-away increments” means that they’re hard to connect together for our visual system, so you need to show a differentiated, second pose while keeping the overall timing. And you can see when I go back to shooting in 2’s (that’s when I take 2 identical frames for one pose, in my 24 fr/sec rate) because there’s a sausage that cheekily moves a bit 😁
Now, in the same line of thoughts, here’s a clip from “Ecorchée“, a fantastic short film by Joachim Hérissé, that I animated on:
Same theory here, but I want to talk about what’s happening on the other side of the heart of the action: the “post-analysis” that I mentioned. This one gives a chance for our brain to reconstruct what it barely saw. In this case, it’s the rebound of the body of Ecorchée and it’s the swaying of the bunny corpse that will piece things together and confirm what happened.
Of course, in a lot of animations, whether it is the pre-analysis or post-analysis, these two moments often correspond to the anticipation and the rebound (or cushioning, or ease-in and -out, however you’re used to call them). But these are mechanical laws of movements. Whereas here, I’m talking about perception, because it is these perception laws of pre- and post-analysis (as I call them) that are key to your dynamic animations.
Here it is frame by frame. Interestingly you will see that I do have a mid-course frame of the skinning itself. I tried without but it didn’t work, so I did that mid-skinning pose. I’m mentioning it because it should always be your bias to try to make it work without those heart-of-the-action poses, as I mentioned earlier. If you will skew in one direction, favour the good ol’ saying “less is more”. But for this one shot, it needed it. Let’s see:
So when you’re doing a very fast action, you don’t actually save that much in number of frames overall, because you need to create more frames, more focus, more time before the move and after the move (pre-analysis and post-analysis – or anticipation and rebound if it also translates mechanically on the elements) than your regular, normal-speed, bumbling-about animation move.
I hope this helps! Practise and test the speed, increments and perception for yourselves!
Today I’d love to share this full plasticine character that I animated for Out of Words, directed by Johan Oettinger. I had a blast the entire time! Stop-motion animation (let alone video games!) is not using plasticine (clay, in American English) all that often and those who know me are well aware that I swear by it!
This shot is featuring one of the recurrent characters of the game who finds themselves in quite the pickle initially. There is a relatively simple armature in the character’s chest and arms (made by Wiredfly’s model-making department) because the size is really quite big to fit the size of the giant hand that was made beforehand. Of course, a bigger size means more weight – plasticine can get heavy quite fast – so in order to sustain that weight in the long and relatively thin arms, it is advised to have an armature. But other than the arm+chest armature, the character is fully plasticine. What a joy for me!
Plasticine is the only material that effortlessly puts me in the zone and nothing is a struggle, even when on the face of it, everything should be a struggle: here, the sheer size of the character, the amount of plasticine to push and pull around to model each pose, plus sculpt-through lip-sync with teeth to take out and put back in all the time, all of this with a tight deadline, I felt stressed initially but very quickly the elation and flow of modelling plasticine throughout the entire 10-second shot totally overrode everything and reminded me why I fell in love with this art and why I wanted to make it my job.
I was so privileged also to work with the Wiredfly team, because Johan, the director and Mikkel Maltesen, the Art Director, gave me free rein in the transformations of the facial elements. I had very little time but I certainly had a ton of fun!
This is a shot I animated for The Pirates! In an Adventure with Scientists, directed by Peter Lord and Jeff Newitt. Be careful, it’s a shot from the climax sequence, so it’s very short! Action, action!
I want to show it to talk about rigging. Disclaimer: I don’t have access to the raw footage, so I will not be able to show you the rigging before the shot was cleaned up, but hopefully I can describe things well enough. The character was rigged in the conventional way, with a ball-and-socket fly rig. The strings of sausages that were flying alongside the character were a little bit of a puzzle though. How to keep them up in the air and also allow for the animation of their individual flying movements? The props department built in some aluminium wire along the string of sausages but it proves insufficient to sustain the weight, what with the maximum size aluminium wire that would be acceptable for these items and the leverage weight of the length of sausages. I asked the rigging department to provide me with a metallic plate, that could be placed above the entire course, like a ceiling because it was not disrupting the lighting of the scene, and to provide me with magnets. I then tied a few fishing wire lengths to the strings of sausages. The fishing wire connected the sausages to the ceiling-metal plate and the magnets were catching that fishing wire and kept it in place on the plate. Ta-dah! Rigging was done! All that was left for me to do was to adjust the length of the fishing wire while advancing the magnets along the plate for each frame.
Here is the flying part of the shot, frame-by-frame:
Today, I want to show 2 shots from Out of Words, following each other, then the timelapse of one. They’re featuring the 2 main characters of the game who have really interesting layers in their personalities and in their feelings, just like the rest of us, they’re so relatable!
I love animating changes or a conflict of emotions, being torn between our loyalty towards different people or situations, playfulness, gentle teasing… all of these animations are oh-so delicious to work on!
The following video is a timelapse of the previous shot: